Location Demo in iOS 8 With Swift

What we will be doing is a simple app the tells your location base on the longitude and latitude.


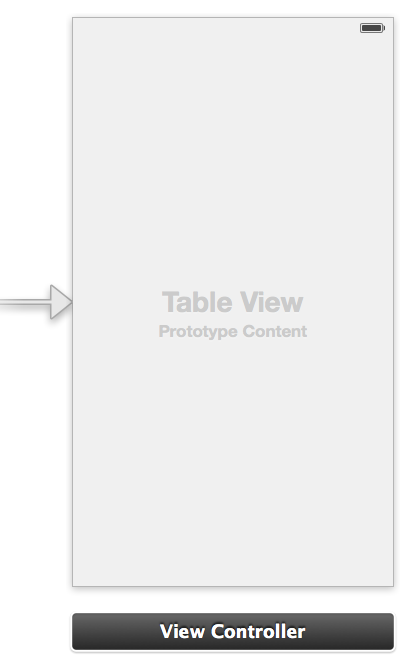
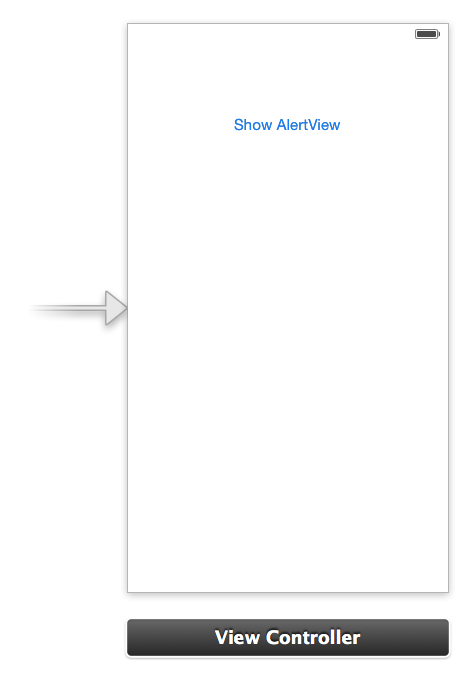
   For making things simpler, I already set-up the UI in this link. Once you have downloaded the files go to storyboard and change the size class from wAny|hANy to wCompact|hRegular. Here is what the story board should look like:


First, add "CoreLocation" to the framework.

Once added, inside the "ViewController.swift" import CoreLocation and add CLLocationManagerDelegate.

Then declare the following variables:

    var locationManager : CLLocationManager = CLLocationManager()

var geocoder : CLGeocoder = CLGeocoder()
var placemark : CLPlacemark = CLPlacemark()

Then insert the following lines of code:

func locationManager(manager: CLLocationManager!, didFailWithError error: NSError!) {
println("didFailWithError %@", error)
var errorAlert : UIAlertView = UIAlertView(title: "Error", message: "Failed to get your location", delegate: nil, cancelButtonTitle: "OK")

}

func locationManager(manager: CLLocationManager!, didUpdateLocations locations: [AnyObject]!) {
//println("didUpdateToLocation %@",locations)

var currentLocation : CLLocation = locations[0] as CLLocation

if currentLocation != nil{
var stringLongitude : NSString = NSString(format: "%0.8f", currentLocation.coordinate.longitude)
var stringLatitude : NSString = NSString(format: "%0.8f", currentLocation.coordinate.latitude)
lbl_longitude.text = stringLongitude
lbl_latitude.text = stringLatitude
}

locationManager.stopUpdatingLocation()


CLGeocoder().reverseGeocodeLocation(manager.location, completionHandler: {(placemarks, error)->Void in

if error {
//println(“Reverse geocoder failed with error” + error.localizedDescription)
println("Reverse geocode failed with error")
return
}

if placemarks.count > 0 {
let pm = placemarks[0] as CLPlacemark
self.displayLocationInfo(pm)
} else {
// println(“Problem with the data received from geocoder”)
println("Problem with the date recieved from geocoder")
}

})


}

func displayLocationInfo(placemark: CLPlacemark) {
if placemark != nil {

var tempString : String = ""

if(placemark.locality != nil){
tempString = tempString + placemark.locality + "\n"
}
if(placemark.postalCode != nil){
tempString = tempString + placemark.postalCode + "\n"
}
if(placemark.administrativeArea != nil){
tempString = tempString + placemark.administrativeArea + "\n"
}
if(placemark.country != nil){
tempString = tempString + placemark.country + "\n"
}

lbl_address.text = tempString

}
}

After inserting the lines of code, insert this lines of code inside the button method:


        locationManager.delegate = self
locationManager.desiredAccuracy = kCLLocationAccuracyBest
locationManager.requestWhenInUseAuthorization()
locationManager.startUpdatingLocation()

Last, inside the Info.plist, add NSLocationAlwaysUsageDescription and NSLocationWhenInUseUsageDescription with both boolean value set to YES.

And that's it. Build and Run the project and you should now be able see your address.

How to implement local notification in Swift

The following steps will guide us on how to develop an application in Swift that implements Local Notification.

Requirements are:

  • Mac
  • Xcode6 - BetaX
  • iOS8

Steps

  1. Open xcode.
  2. Create a Single View Application, let's name it LocalNotification.
  3. Register for user notification.
    1. In the newly created project, open AppDelegate.swift
    2. Insert the lines below in: didFinishLaunchingWithOptions
    3. application.registerUserNotificationSettings(UIUserNotificationSettings(forTypes: UIUserNotificationType.Sound | UIUserNotificationType.Alert |
      UIUserNotificationType.Badge, categories: nil
      ))
  4. To show an alert view when we received a local notification, we need to override: didReceiveLocalNotification,
  5. func application(application: UIApplication, didReceiveLocalNotification notification: UILocalNotification) {
    print("received local notification")

    application.applicationIconBadgeNumber = 0

    var alert = UIAlertView()
    alert.title = "Alert"
    alert.message = notification.alertBody
    alert.addButtonWithTitle("Dismiss")

    alert.show()
    }
  6. To demo local push notification in our app, we override ViewController.swift viewDidLoad method. So open this file and paste the lines below:
  7. override func viewDidLoad() {
    super.viewDidLoad()
    // Do any additional setup after loading the view, typically from a nib.

    var localNotification = UILocalNotification()
    localNotification.fireDate = NSDate(timeIntervalSinceNow: 30)
    localNotification.alertBody = "Hello World"
    localNotification.timeZone = NSTimeZone.defaultTimeZone()
    localNotification.applicationIconBadgeNumber = 1
            //play a sound
    localNotification.soundName = UILocalNotificationDefaultSoundName;
    localNotification.alertAction = "View"

    UIApplication.sharedApplication().scheduleLocalNotification(localNotification)
    }
  8. To test if our app works, open the app and let it open the view. Then open another app, or just hide our app. After 30 seconds you should received a push notification alert.
  9. Note that local notification only works on real iPhone device.

    Binary fuzzing strategies: what works, what doesn't

    Successful fuzzers live and die by their fuzzing strategies. If the changes made to the input file are too conservative, the fuzzer will achieve very limited coverage. If the tweaks are too aggressive, they will cause most inputs to fail parsing at a very early stage, wasting CPU cycles and spewing out messy test cases that are difficult to investigate and troubleshoot.


    Designing the mutation engine for a new fuzzer has more to do with art than science. But one of the interesting side effects of the design of american fuzzy lop is that it provides a rare feedback loop: you can carefully measure what types of changes to the input file actually result in the discovery of new branches in the code, and which ones just waste your time or money.


    This data is particularly easy to read because the fuzzer also approaches every new input file by going through a series of progressively more complex, but exhaustive and deterministic fuzzing strategies - say, sequential bit flips and simple arithmetics - before diving into purely random behaviors. The reason for this is the desire to generate the simplest and most elegant test cases first; but the design also provides a very good way to quantify how much value each new strategy brings in to the table - and whether we need it at all.


    The measurements of afl fuzzing efficiency for reasonably-sized test cases are remarkably consistent across a variety of real-world binary formats - anything ranging from image files (JPEG, PNG, GIF, WebP) to archives (gzip, xz, tar) - and because of this, I figured that sharing the data more broadly will be useful to folks who are working on fuzzers of their own. So, let's dive in:


    • Walking bit flips: the first and most rudimentary strategy employed by afl involves performing sequential, ordered bit flips. The stepover is always one bit; the number of bits flipped in a row varies from one to four. Across a large and diverse corpus of input files, the observed yields are:


      • Flipping a single bit: ~70 new paths per one million generated inputs,
      • Flipping two bits in a row: ~20 additional paths per million generated inputs,
      • Flipping four bits in a row: ~10 additional paths per million inputs.


      (Note that the counts for every subsequent pass include only the paths that could not have been discovered by the preceding strategy.)


      Of course, the strategy is relatively expensive, with each pass requiring eight execve() per every byte of the input file. With the returns are diminishing rapidly, afl stops after these three passes - and switches to a second, less expensive strategy past that point.


    • Walking byte flips: a natural extension of walking bit flip approach, this method relies on 8-, 16-, or 32-bit wide bitflips with a constant stepover of one byte. This strategy discovers around ~30 additional paths per million inputs, on top of what could have been triggered with shorter bit flips.


      It should be fairly obvious that each pass takes approximately one execve() call per one byte of the input file, making it surprisingly cheap, but also limiting its potential yields in absolute terms.


    • Simple arithmetics: to trigger more complex conditions in a deterministic fashion, the third stage employed by afl attempts to subtly increment or decrement existing integer values in the input file; this is done with a stepover of one byte. The experimentally chosen range for the operation is -35 to +35; past these bounds, fuzzing yields drop dramatically. In particular, the popular option of sequentially trying every single value for each byte (equivalent to arithmetics in the range of -128 to +127) helps very little and is skipped by afl.


      When it comes to the implementation, the stage consists of three separate operations. First, the fuzzer attempts to perform subtraction and addition on individual bytes. With this out of the way, the second pass involves looking at 16-bit values, using both endians - but incrementing or decrementing them only if the operation would have also affected the most significant byte (otherwise, the operation would simply duplicate the results of the 8-bit pass). The final stage follows the same logic, but for 32-bit integers.


      The yields for this method vary depending on the format - ranging from ~2 additional paths per million in JPEG to ~8 per million in xz. The cost is relatively high, averaging around 20 execve() calls per one byte of the input file - but can be significantly improved with only a modest impact on path coverage by sticking to +/- 16.


    • Known integers: the last deterministic approach employed by afl relies on a hardcoded set of integers chosen for their demonstrably elevated likelihood of triggering edge conditions in typical code (e.g., -1, 256, 1024, MAX_INT-1, MAX_INT). The fuzzer uses a stepover of one byte to sequentially overwrite existing data in the input file with one of the approximately two dozen "interesting" values, using both endians (the writes are 8-, 16-, and 32-bit wide).


      The yields for this stage are between 2 and 5 additional paths per one million tries; the average cost is roughly 30 execve() calls per one byte of input file.


    • Stacked tweaks: with deterministic strategies exhausted for a particular input file, the fuzzer continues with a never-ending loop of randomized operations that consist of a stacked sequence of:


      • Single-bit flips,
      • Attempts to set "interesting" bytes, words, or dwords (both endians),
      • Addition or subtraction of small integers to bytes, words, or dwords (both endians),
      • Completely random single-byte sets,
      • Block deletion,
      • Block duplication via overwrite or insertion,
      • Block memset.


      Based on a fair amount of testing, the optimal execution path yields appear to be achieved when the probability of each operation is roughly the same; the number of stacked operations is chosen as a power-of-two between 1 and 64; and the block size for block operations is capped at around 1 kB.


      The absolute yield for this stage is typically comparable or higher than the total number of execution paths discovered by all deterministic stages earlier on.


    • Test case splicing: this is a last-resort strategy that involves taking two distinct input files from the queue that differ in at least two locations; and splicing them at a random location in the middle before sending this transient input file through a short run of the "stacked tweaks" algorithm. This strategy usually discovers around 20% additional execution paths that are unlikely to trigger using the previous operation alone.


      (Of course, this method requires a good, varied corpus of input files to begin with; afl generates one automatically, but for other tools, you may have to construct it manually.)


    As you can see, deterministic block operations (duplication, splicing) are not attempted in an exhaustive fashion; this is because they generally require quadratic time (or worse) - so while their yields may be good for very short inputs, they degrade very quickly.


    Well, that's it! If you ever decide to try out afl, you can watch these and other cool stats on your screen in real time.

    A bit more about american fuzzy lop


    Fuzzing is one of the most powerful strategies for identifying security issues in real-world software. Unfortunately, it also offers fairly shallow coverage: it is impractical to exhaustively cycle through all possible inputs, so even something as simple as setting three separate bytes to a specific value to reach a chunk of unsafe code can be an insurmountable obstacle to a typical fuzzer.


    There have been numerous attempts to solve this problem by augmenting the process with additional information about the behavior of the tested code. These techniques can be divided into three broad groups:


    • Simple coverage maximization. This approach boils down to trying to isolate initial test cases that offer diverse code coverage in the targeted application - and them fuzzing them using conventional techniques.


    • Control flow analysis. A more sophisticated technique that leverages instrumented binaries to focus the fuzzing efforts on mutations that generate distinctive sequences of conditional branches within the instrumented binary.


    • Static analysis. An approach that attempts to reason about potentially interesting states within the tested program and then make educated guesses about the input values that could possibly trigger them.


    The first technique is surprisingly powerful when used to pre-select initial test cases from a massive corpus of valid data - say, the result of a large-scale web crawl. Unfortunately, coverage measurements provide only a very simplistic view of the internal state of the program, making them less suited for creatively guiding the fuzzing process later on.


    The latter two techniques are extremely promising in experimental settings. That said, in real-world applications, they are not only very slow, but frequently lead to irreducible complexity: most of the high-value targets will have a vast number of internal states and possible execution paths, and deciding which ones are interesting and substantially different from the rest is an extremely difficult challenge that, if not solved, usually causes the "smart" fuzzer to perform no better than a traditional one.


    American fuzzy lop tries to find a reasonable middle ground between sophistication and practical utility. In essence, it's a fuzzer that relies on a form of edge coverage measurements to detect subtle, local-scale changes to program control flow without having to perform complex global-scale comparisons between series of long and winding execution traces - a common failure point for similar tools.


    In almost-plain English, the fuzzer does this by instrumenting every effective line of C or C++ code (or any other GCC-supported language) to record a tuple in the following format:


    [ID of current code location], [ID of previously-executed code location]


    The ordering information for tuples is discarded; the primary signal used by the fuzzer is the appearance of a previously-unseen tuple in the output dataset; this is also coupled with coarse magnitude count for tuple hit rate. This method combines the self-limiting nature of simple coverage measurements with the sensitivity of control flow analysis. It detects both explicit conditional branches, and indirect variations in the behavior of the tested app.


    The output from this instrumentation is used as a part of a simple, vaguely "genetic" algorithm:


    1. Load user-supplied initial test cases into the queue,


    2. Take input file from the queue,


    3. Repeatedly mutate the file using a balanced variety of traditional fuzzing strategies (see later),


    4. If any of the generated mutations resulted in a new tuple being recorded by the instrumentation, add mutated output as a new entry in the queue.


    5. Go to 2.


    The discovered test cases are also periodically culled to eliminate ones that have been made obsolete by more inclusive finds discovered later in the fuzzing process. Because of this, the fuzzer is useful not only for identifying crashes, but is exceptionally effective at turning a single valid input file into a reasonably-sized corpus of interesting test cases that can be manually investigated for non-crashing problems, handed over to valgrind, or used to stress-test applications that are harder to instrument or too slow to fuzz efficiently. In particular, it can be extremely useful for generating small test sets that may be programatically or manually examined for anomalies in a browser environment.


    (For a quick partial demo, click here.)


    Of course, there are countless "smart" fuzzer designs that look good on paper, but fail in real-world applications. I tried to make sure that this is not the case here: for example, afl can easily tackle security-relevant and tough targets such as gzip, xz, lzo, libjpeg, libpng, giflib, libtiff, or webp - all with absolutely no fine-tuning and while running at blazing speeds. The control flow information is also extremely useful for accurately de-duping crashes, so the tool does that for you.


    In fact, I spent some time running it on a single machine against libjpeg, giflib, and libpng - some of the most robust best-tested image parsing libraries out there. So far, the tool found:


    • CVE-2013-6629: JPEG SOS component uninitialized memory disclosure in jpeg6b and libjpeg-turbo,


    • CVE-2013-6630: JPEG DHT uninitialized memory disclosure in libjpeg-turbo,


    • MSRC 0380191: A separate JPEG DHT uninitialized memory disclosure in Internet Explorer,


    • CVE-2014-1564: Uninitialized memory disclosure via GIF images in Firefox,


    • CVE-2014-1580: Uninitialized memory disclosure via <canvas> in Firefox,


    • Chromium bug #398235, Mozilla bug #1050342: Probable library-related JPEG security issues in Chrome and Firefox (pending),


    • PNG zlib API misuse bug in MSIE (DoS-only),


    • Several browser-crashing images in WebKit browsers (DoS-only).


    More is probably to come. In other words, you should probably try it out. The most significant limitation today is that the current fuzzing strategies are optimized for binary files; the fuzzer does:


    • Walking bitflips - 1, 2, and 4 bits,


    • Walking byte flips - 1, 2, and 4 bytes,


    • Walking addition and subtraction of small integers - byte, word, dword (both endians),


    • Walking insertion of interesting integers (-1, MAX_INT, etc) - byte, word, dword (both endians),


    • Random stacked flips, arithmetics, block cloning, insertion, deletion, etc,


    • Random splicing of synthetized test cases - pretty unique!


    All these strategies have been specifically selected for an optimal balance between fuzzing cost and yields measured in terms of the number of discovered execution paths with binary formats; for highly-redundant text-based formats such as HTML or XML, syntax-aware strategies (template- or ABNF-based) will obviously yield better results. Plugging them into AFL would not be hard, but requires work.

    Rettelse om avkastningen til Flytoget

    Jonas Gahr Støre kom i DN onsdag i skade for å forveksle bokført egenkapital med markedsverdi, og klarte dermed å få det til at Flytoget har hatt en avkastning på egenkapitalen på 17 %. Dette er mye, og Støre er sikker på at plassering av pengene i Oljefondet vil gi lavere avkastning. 

    Det riktige skal selvsagt være at Flytoget hadde et resultat etter skatt på 17 % av bokført egenkapital. Avkastningen kan vi ikke vite, ettersom vi ikke har noen markedsverdi på Flytogets egenkapital. 

    17 % er uansett ikke mye sammenlignet med Oljefondet, som hadde en avkastning på 25 % i fjor målt i norske kroner. 

    Det er ikke grunn til å forvente annen avkastning enn oljefondets for de som eventuelt kjøper Flytoget. Flytogets aksjer vil prises på akkurat samme måte som selskapene i oljefondets portefølje. 

    Stat gir fortsatt ikke meravkastning

    Anders Imenes mener analysen er for enkel når jeg finner at statlige selskaper ikke er mer lønnsomme enn private, og at vi trenger minst hundre års data med oljefondet som referanseindeks for å kunne sin noe om saken (DN 23.7).

    Jeg skulle veldig gjerne hatt hundre års pålitelig data på utviklingen til statlige selskaper i forhold til privateide i Norge, men det har vi ikke. Et problem er at få statlige selskaper var børsnotert før slutten av 90-tallet. Siden den mest pålitelige verdsettingen er markedsverdi på omsatte aksjer, er det betydelig vanskeligere (men ikke umulig) å beregne pålitelig avkastning før børsnotering. 

    Det er jo alltid slik at mer data er bedre, men den informasjonen vi har er ikke verdiløs av den grunn. Jeg vet om flere ting som kan forbedre min analyse for den som har tid og lyst. Inntil da er likevel «ingen forskjell» den mest sannsynlige konklusjonen.

    For å avdekke effekten av statlig eierskap må vi sammenligne likt med likt. Det som sannsynligvis ligner mest på statlig eide norske bedrifter, er privat eide norske bedrifter. Oslo Børs er derfor den relevante indeksen.

    Imenes mener også at politikerne kan øke verdien til statens selskaper ved å gi dem særfordeler. Staten vil da av og til velge dårlige løsninger for å beskytte egne virksomheter. Det kan ikke være hensiktsmessig.

    Til sist mener Imenes at skattepolitikk bør drives med statlig eierskap, fordi politisk bekjempelse av skatteunndragelse er nytteløst. Men skatteparadisene har lite å stille opp mot EU og USA, som har felles interesser. Det skjer en kontinuerlig utvikling på dette området, der trenden er at det blir stadig vanskeligere å unngå skatt gjennom bruk av skatteparadis, Irland, Nederland og Luxembourg er for tiden under etterforskning av EU for å ha bidratt til dette.

    Les Imenes sitt svar her

    Useful Article Links in Studying Swift

    1.) For studying the basic of swift :
         file:///Users/czetsuya/Downloads/404_advanced_swift.pdf-,%20attachment

    2.) Useful for studying "Case Classes"
         http://masteringios.com/blog/2014/06/26/hello-swift/2/

    3.) “Building Adaptive Apps with UIKit” 
         https://developer.apple.com/videos/wwdc/2014/

    4.)  Size Classes With Xcode 6: One Storyboard For All Sizes
          http://www.learnswift.io/blog/2014/6/12/size-classes-with-xcode-6-and-swift

    Create a simple table view app in xcode

    Open Xcode and create a new Single View Application. For product name, use SimpleTableView and then fill out the Organization Name and Company Identifier with your customary values. Select iPhone for Devices.


    Drag a table view inside the view controller.


    Connect the table view's datasource and delegate by right-clicking on the Table View and dragging from the circle to the View Controller.


    First, we have to create an array where the the data will be coming from. Inside "ViewController.m"'s interface, add the the line
    @property (strong, nonatomic) NSArray *data;

    Next, inside the method viewDidLoad we have to allocate the array. This is gonna be the value of each cell in the table.
     self.data = [[NSArray alloc] initWithObjects:@"Number 1",@"Number 2", @"Number3", nil];

    Next, we have to add the delegate. Change this line of code
    @interface ViewController ()
    to
    @interface ViewController () <UITableViewDataSource, UITableViewDelegate>

    Next, we have to implement the delegate methods. Add the following lines of code inside the "ViewController.m"
    -(NSInteger)tableView:(UITableView *)tableView numberOfRowsInSection:(NSInteger)section
    {
    return self.data.count;
    }

    - (UITableViewCell *)tableView:(UITableView *)tableView cellForRowAtIndexPath:(NSIndexPath *)indexPath
    {
    static NSString *cellID = @"cellId";
    UITableViewCell *cell = [tableView dequeueReusableCellWithIdentifier:cellID];

    if (!cell)
    {
    cell = [[UITableViewCell alloc] initWithStyle:UITableViewCellStyleDefault reuseIdentifier:cellID];
    }

    cell.textLabel.text = [self.data objectAtIndex:indexPath.row];

    return cell;
    }

    Build and Run the project, you should now be able to see a very simple table view.


    You can download the source code of the SimpleTableView at my repository on bitbucket.

    XCode How to read raw data from pipe-delimited text file

    Open Xcode and create a new Single View Application. For product name, use ReadPipeDelimitedTextfield and then fill out the Organization Name and Company Identifier with your customary values. Select iPhone for Devices.


    I have prepared a text file to be used in this project, it can be download in this link. Download the text file and add it inside the project. 

    Once the file has been added, go inside the "ViewController.m" and add the following lines of code inside the viewDidLoad:

        NSError *error;
    NSString* filePath = [[NSBundle mainBundle] pathForResource:@"US States" ofType:@"txt"];
    NSString *USStates = [NSString stringWithContentsOfFile:filePath
    encoding:NSUTF8StringEncoding error:&error];
    NSString *statesStripped = [USStates stringByReplacingOccurrencesOfString:@"\r" withString:@""];

    NSArray *rows = [statesStripped componentsSeparatedByString:@"\n"];

    NSArray *components;

    for(int i = 0; i < [rows count]; i++){
    if(i == 0 || [[rows objectAtIndex:i] isEqualToString:@""]){
    continue;
    }

    components = [[rows objectAtIndex:i] componentsSeparatedByString:@"|"];

    NSLog(@"State: %@ Abbr: %@", [components objectAtIndex:0], [components objectAtIndex:1]);
    }

    Notice how the value of "pathForResource" is equivalent to the name of the text file.

    Build and Run the project, inside the console you should see the contents of the text files which are now separated.


    You can download the source code of the ReadPipeDelimitedTextfield at my repository on bitbucket.

    XCode: Create A Simple AlertView

    Open Xcode and create a new Single View Application. For product name, use SimpleAlertView and then fill out the Organization Name and Company Identifier with your customary values. Select iPhone for Devices.


    Drag a button inside the view controller and change its title to "Show AlertView".


    We will need to connect the button to the view controller. Select the assistant editor and open the ViewController.m file. Ctrl and drag from the label to the class section and create the following action.


    Inside the ViewController.m, change the line
    @interface ViewController ()
    to
    @interface ViewController () <UIAlertViewDelegate>


    Inside the method of btn_showAlertView that we have created, insert this lines of code
     
    UIAlertView * alert =[[UIAlertView alloc ] initWithTitle:@"OK Dialog"
    message:@"This is OK dialog"
    delegate:self
    cancelButtonTitle:@"Ok"
    otherButtonTitles: nil];
    [alert addButtonWithTitle:@"Cancel"];
    [alert show];


    To handle which button is clicked, insert this method

    - (void)alertView:(UIAlertView *)alertView didDismissWithButtonIndex:(NSInteger)buttonIndex
    {
    if (buttonIndex == 0)
    {
    NSLog(@"You have clicked Ok");
    }
    else if(buttonIndex == 1)
    {
    NSLog(@"You have clicked Cancel");
    }
    }

    Build and Run the project, an alert view should appear when the "Show AlertView" button is clicked.

    You can download the source code of the SimpleAlertView at my repository on bitbucket.